Handmade labels add charm and individuality to items like gifts, homemade jams, stationery, toys, and even business packaging. I often find that crafting labels by hand doesn’t just make my projects look unique; it gives everything a personal feel that mass-produced stickers just can’t match. Here’s a look at how to easily craft your own labels, the tools that help, and a few tips to keep things fun and practical.
Why Handmade Labels Add Value
Making your own labels brings a warmth and personality you just don’t get from store-bought options. Whether you’re labeling a batch of cookies for the school fundraiser or trying to dress up your small business packaging, that bit of extra effort goes a long way. I’ve found people tend to remember thoughtful touches, and a simple handmade label often sparks conversation.
Big brands spend a lot of money trying to make products stand out, but a handmade label catches the eye because it’s clearly made by a real person. It also gives you a chance to show off your style. You can go quirky, elegant, minimalist, or make it over the top and decorative; the choice is yours. If you’re running a business, a handmade label signals care and authenticity, which helps with customer loyalty. These days, people appreciate personal details more than ever, so taking the time feels worthwhile.
Getting Started with Handmade Labels
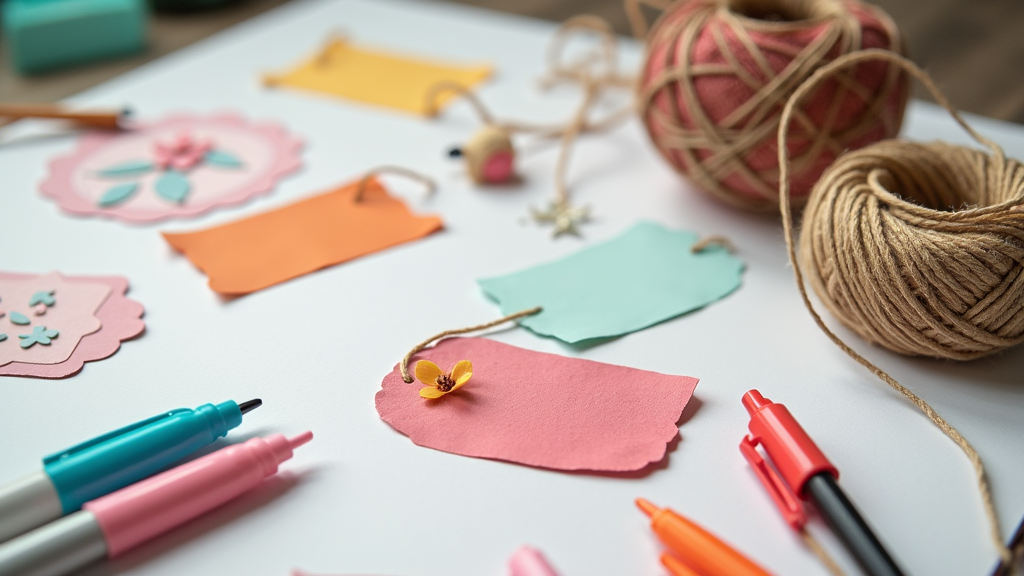
You don’t need expensive tools or years of art training to make nice looking labels. Here’s how I usually set myself up:
- Paper or Cardstock: Thicker paper holds up better and feels more substantial. Kraft paper, watercolor paper, or colored cardstock all work great.
- Markers and Pens: Fine liners are useful for neat writing, while brush pens give your labels a fancier look.
- Stamps: Rubber stamps add flair, and you can reuse them for different projects.
- Scissors, Craft Punches, and Paper Trimmers: Shaping the labels makes them look extra polished.
- String, Ribbon, or Washi Tape: These are perfect for attaching your labels or adding decorative borders.
- Glue or Double Sided Tape: Handy for sticking labels onto jars, boxes, or gift bags.
If you want to go digital, there are some cool online tools that make label design easier and let you print out professional looking tags at home. I’ll talk about those in a minute.
Step by Step: Making Your Own Labels
- Pick Your Size and Shape: Decide how big or small you want your label, and whether you want a classic rectangle, a circle, or something fancy like a scalloped edge.
- Cut the Paper: Use scissors or a craft punch. I like using a template or stencil if I’ve got lots to make.
- Decorate Your Label: Write the text (name, message, or product info) neatly with a pen. If you want, add in stamps, simple doodles, or some color with markers. Just a border in a bold color makes a label look finished.
- Embellish (Optional): Stick on something like a small, pressed flower, some glitter, or a sticker if you’re feeling creative.
- Attach or Apply: Punch a hole for string, use washi tape for a pop of color, or stick your label right onto whatever you’re labeling using glue or double-sided tape.
Designing Labels Online: Top Tools Worth Checking Out
If drawing isn’t your thing or you want to make a bunch of matching labels, there are some solid online options. My go-to’s are VistaPrint and Canva.
VistaPrint is known for its printing services, but the design tools on their website are pretty handy too. You can pick from loads of templates, change fonts and colors, and then either print at home or order professional prints. It’s a good fit for anyone running a small shop, since they offer bulk orders for things like product labels and custom stickers.
Canva is super user friendly and has free options. I use Canva to quickly drag and drop icons, create layouts with guides, and try out different looks. Canva also offers print services, or you can just download and print from your own printer. The free library of templates covers everything from minimalist styles to colorful playful designs. And if you want to get really wild, you can upload your own logos or artwork. (I created my logo for this website on Canva.)
If you want even more creative control, Adobe Express is worth a mention. It’s a bit more advanced, but also flexible. You can use their templates or start from scratch.
Things to Think About When Making Labels
- What Are You Labeling? Jam jars, wedding favors, party bags, or homemade skincare all benefit from different label styles. Waterproof materials are handy for bathroom or kitchen items, while decorative paper works great for gifts.
- How Will You Attach the Label? Some projects need old fashioned string through a punched hole, while others just need a sticker style backing.
- Readability: I’ve sometimes gotten too creative with paint pens or curly fonts, only to realize nobody can read what it says. Clear lettering is always better, especially for food or business items.
- Durability: For anything exposed to oil, water, heat, or cold, use materials and inks that hold up. Laminating a paper label with clear tape or using printable sticker or waterproof paper can make a difference.
- Colors and Theme: Try picking a color scheme that matches your event, brand, or mood. Even just using colored twine or a pop of patterned tape can bring your look together.
Choosing the Right Adhesive
Glue sticks, rubber cement, spray adhesive, and double-sided tape are popular options, but I usually just grab whatever’s in my desk drawer, honestly. For glass and plastic, self-adhesive sticker paper works well and is easy to remove later. For cardboard or gift bags, a glue stick is usually good enough.
Personalizing Labels for Events and Gifts
I get the most compliments when I add just one extra personal detail, like a hand drawn border, a little watercolor splash, or a handwritten note on the label. Especially for parties or holidays, themed stamps and stickers can really pull everything together. For bigger batches, like wedding favors or business giveaways, printing out a base design and then hand finishing with each name or message is a nice way to keep it both easy and personal.
Simple Troubleshooting Tips
- Paper Smearing: Make sure any ink is totally dry before stacking labels.
- Crooked Cutting: Use a ruler or template when marking your paper, and slow down when cutting so shapes come out neat.
- Printer Jams (if printing): Check your settings to make sure your paper type matches what your printer expects. Printable sticker paper can be a little thicker than what some home printers like, so feed the sheet slowly.
- Peeling Labels: If your labels won’t stick, try cleaning the area first or switch to a stronger adhesive.
Fun Ideas for Handmade Labels
- Kraft paper tags with twine for rustic gifts
- Colorful washi tape edges for a playful vibe on notebooks or jars
- Mini watercolor paintings as the background for a splash of homemade art
- Personalized doodles or icons, great for kids’ school supplies or party favors
- Foil stickers or embossing for fancy party or wedding labeling
- QR codes if you want to link to a photo album, recipe, or website. Canva makes scanning in easy
Frequently Asked Questions
Question: Do I need special tools or machines to make labels at home?
Answer: Not at all! Scissors, nice paper, a good pen, and tape or glue are often enough. Some people enjoy using label makers or cutting machines, but you don’t have to go out and buy new gear if you’re just starting.
Question: What are my options if I want to make a large batch of labels?
Answer: Consider designing your label on Canva or VistaPrint and printing multiple copies at once. You can order ready to stick labels from these services if you want to save time. If you want to keep a personal touch, try combining a printed base with some hand finishing—like writing in individual names or adding a stamped accent.
Question: How can I make waterproof labels at home?
Answer: Printable waterproof sticker paper is available online and works with inkjet or laser printers. Laminating labels with clear adhesive film or tape also works for basic projects.
Wrapping Up: Make It Your Own
Handmade labels are about mixing creativity with practical needs. I find the process just as rewarding as the finished tags themselves. Whether you go digital with tools like Canva and VistaPrint or stick to classic markers and craft paper at home, the result is always something personal and memorable. It’s worth trying a few different styles or techniques until you find what fits your vibe best. Remember, sometimes a simple handdrawn touch makes all the difference, and experimenting with materials can lead to unexpected results. So, grab your supplies and make some labels that truly reflect your style and message.
Fantastic read! I have those scissors that create fun edging, so I need to use them more and make my own tags!
Those scissors are fun to play with. I love paper crafts.