Making your own stationery at home really is a fun, satisfying activity that lets you express your creativity. Not only do you have total creative control, but adding those unique touches gives your letters and cards a special vibe you simply can’t get from storebought options. Whether you’re making note cards, envelopes, bookmarks, or mini prints, there are tons of ways to use simple materials to come up with something you’ll actually be excited to send. Here, I’ll cover my favorite basics, share some cool techniques, and throw in a few practical tips to help you get results you’ll love—even if you’re totally new to making DIY stationery.
Heads up! This post may contain Amazon affiliate links. That means if you click and make a purchase, I may earn a small commission—at no extra cost to you. I only recommend products I truly love or think you’ll find useful.
Choosing Materials for Homemade Stationery
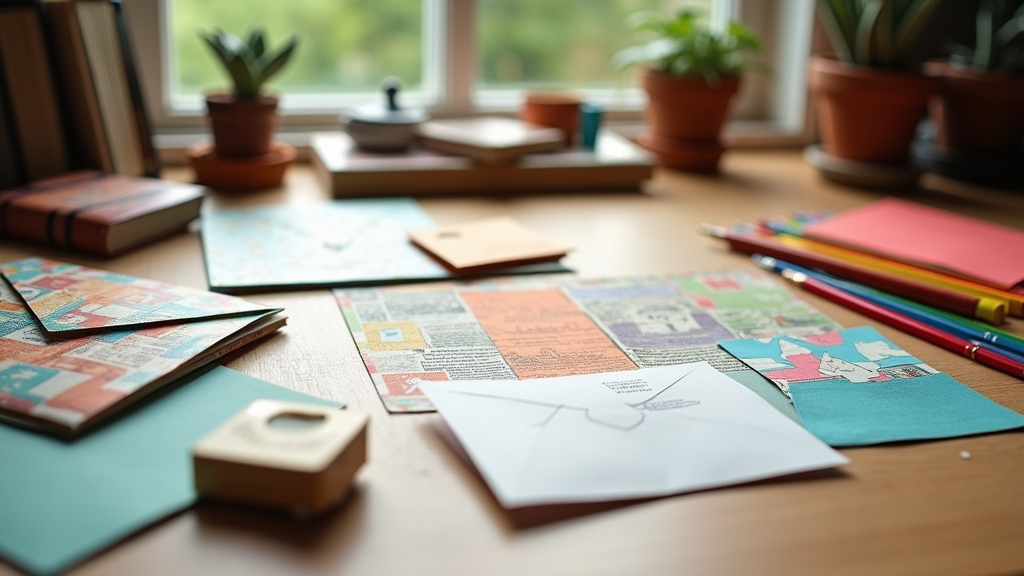
Picking the best supplies is half the fun, and you don’t have to spend a fortune. Cardstock, regular printer paper, watercolors, rubber stamps, ink pads, scrapbook paper, magazines, washi tape, and a trusty set of scissors are all fair game. If you’ve got a home printer, a paper trimmer, or decorative edge punches lying around, that’s a bonus. But honestly, the basics are all you need.
I’d suggest starting out with plain white or cream cardstock. It’s thick, works great with paint and markers, and makes a nice base. Scrapbook paper is perfect for making custom envelopes or special accents. And don’t overlook old magazines—pages loaded with bold colors or interesting patterns are just right for one-of-a-kind envelopes or cool collage bits.
Designing and Customizing Stationery
This is where your personal touch comes in. Even a few simple changes can morph a plain card into something eye-catching. Try adding colored borders, paint a subtle background, or stamp in a favorite motif. If you want a matching look, create a little set in your favorite color combo or with a recurring pattern. Layer washi tape, glue down cutout images, or doodle a border for added character—these tricks give quick depth and personality.
- Watercolor Washes: Brush watered-down paint across the top of your cards for a super fast, nextlevel cool background.
- Stamping: Rubber or clear stamps provide crisp, repeatable designs. Stamping the corner or running a line down the side adds flair.
- Hand Lettering: Just writing a fun “hello,” or your initials in a bold style can turn plain cardstock into a statement note.
- Layered Cutouts: Grab colored papers or magazine bits, cut out simple shapes, and glue them in place. Layer them to create collage-style cards or page borders.
Look at designs you stumble upon in favorite stationery shops, then twist those ideas to fit your own style. If you like a simpler look, stick to one pattern or a single color family to keep things clean.
Making Your Own Envelopes
Homemade envelopes are a project all by themselves and can really set your stationery apart. Using scrapbook paper or magazine pages means your envelopes will be as unique as your cards. For example, those colorful magazine spreads or editorial layouts are awesome for bold envelopes, while scrapbook sheets are just the right thickness and come in endless prints.
- Scrapbook Paper: Pick your favorite pattern, trace an envelope template, cut it out, and fold for instant DIY envelopes.
- Magazines: Focus on pages with big, colorful backgrounds or interesting textures. Magazine pages can be slippery, so use good glue or stickytape to keep seams closed.
No template? Just pull apart any storebought envelope, flatten it out, and trace onto your chosen paper. Then cut, fold, and glue—it’s straightforward and even a slightly wonky one ends up looking charmingly handmade.
Step-by-Step: DIY Stationery Kit at Home
A simple DIY stationery kit saves you a ton of time and makes it easy to create matching cards and envelopes whenever inspiration hits. Here’s what I keep ready:
- Cardstock and Paper: A mix of blank sheets, notecards, and precut or folded cards.
- Decorative Paper: Scrapbook scraps, magazine pages, colored samples, and wrapping paper bits.
- Glue and Tape: Use doublestick tape, glue sticks, and some washi tape to hold things and add quick decoration.
- Cutting Tools: Scissors, craft knife, and a small trimmer for straight lines.
- Stamps and Ink Pads: A few favorites in classic or fun colors.
- Pens and Brushes: Fine black pens, brushpens, watercolor supplies, and a handful of colored pencils or markers.
- Envelopes: Both DIY envelopes and some basic store ones for quick use.
With these basics, you can always whip together a quick personalized card, matching envelope, or bright tag when you need it.
Tips for Beginners and Common Mistakes
Getting started can be a bit nerve wracking, but the good news is, it’s easier than you think. Keep it simple at first—a basic card, a rubber stamp, and a homemade envelope already look way more special than anything from a store.
- Test Supplies: Since some magazine pages are slick or coated, try your glue and marker pens in a small spot before diving in fully.
- Don’t Rush: Allow layers to dry and line things up carefully before gluing or stamping. Patience pays off for clean designs.
- Straight Lines: If cutting isn’t your thing, run your scissors along the edge of a ruler or use a paper cutter for sharp results.
- Save Every Scrap: Smaller bits of paper are perfect for details, patching up mistakes, or practicing new techniques. Nothing goes to waste.
And remember, mistakes are part of handmade charm! If your ink smears, just layer on some washi tape or paste on a little cutout. Lean into those quirks—they make each piece genuinely yours.
Advanced Decorating Ideas
Ready to take things up a notch? Once you’re comfy with the basics, try these creative ideas to give your stationery a next level cool finish:
Layered Textures: Mix up materials like vellum, pressed flowers, or try embossing for a raised feel. You can even sandwich a bit of lace or mesh between layers for added appeal.
Envelope Liners: Bring more polish by slipping magazine pages or patterned paper inside your envelopes. This simple trick makes opening mail feel even more special.
Creative Seals: Use a wax seal, a bright sticker, or a drawn doodle to close your envelopes. Wax kits add an old school, charming touch that really stands out.
Digital Meets Handmade: If you’re comfortable working digital, design your own backgrounds or templates, print them out, and decorate by hand. It’s the quickest way to create coordinated sets or custom notepads that look pro but still feel personal.
Creative Uses for Homemade Stationery
Handmade stationery isn’t just for formal notes—keep sets on hand for thank yous, birthdays, or small gifts. Pair up cards with matching envelopes, bundle with ribbon, and you have an ecofriendly gift that’s also totally unique. Your penpals or friends will appreciate the extra thought.
- Send cheerful quick notes to lift a friend’s mood
- Use as journal prompts or mini motivational cards on your desk
- Create a handmade set to give as a thoughtful present
- Jazz up your home office or workspace with color-coordinated mini prints
Even everyday stuff like grocery lists or keeping track of appointments feels more fun on colorful, custom stationery. I’ve even stuck a card on the wall as a pop of inspiration—it really makes a difference.
Frequently Asked Questions
Do I need any special tools or machines?
Nope! Scissors, glue, and sturdy paper are all you need to start. If you love crisp edges, a small trimmer helps, but it’s not required.
What’s the cheapest way to make envelopes?
Magazine pages, wrapping paper remnants, or colorful flyers work great. Trace, cut, and fold—simple as that, and no fancy devices needed.
Can I mail homemade envelopes?
For sure! Just make sure your envelope fits your local post’s guidelines and is glued shut tight. If you’re using busy patterns, slap on a plain sticker or label for your address so it’s easy to read.
How can I fix a mistake on my stationery?
Easy—stickers, doodles, or layering paper can patch up smears or cover up any “oopsies.” Sometimes what started as a mistake becomes your favorite detail!
Wrapping Up Your At-Home Stationery Project
Making stationery at home is about experimenting and putting your own twist on every detail. Each piece is really unique—even when you work in batches, no two pieces are exactly the same. It’s a relaxing way to add more personality to your notes, giftwraps, or workspace. All you need is a good pair of scissors, a mix of paper, and a spark of inspiration to start. Try blending scraps from magazines with scrapbook paper for envelopes that look better than anything you’d buy. You might be surprised how polished your own creations turn out!
I used to make my own envelopes all the time when I entered sweepstakes, the flashier the better but when the internet came along, it took my contest entering days away!
I use t love to enter sweepstakes. I still follow the contest queen on YouTube. Also, one of my favorite books is The Prize Winner of Defiance, Ohio. Based on a true story, It was also made into a movie starring Julianne Moore.