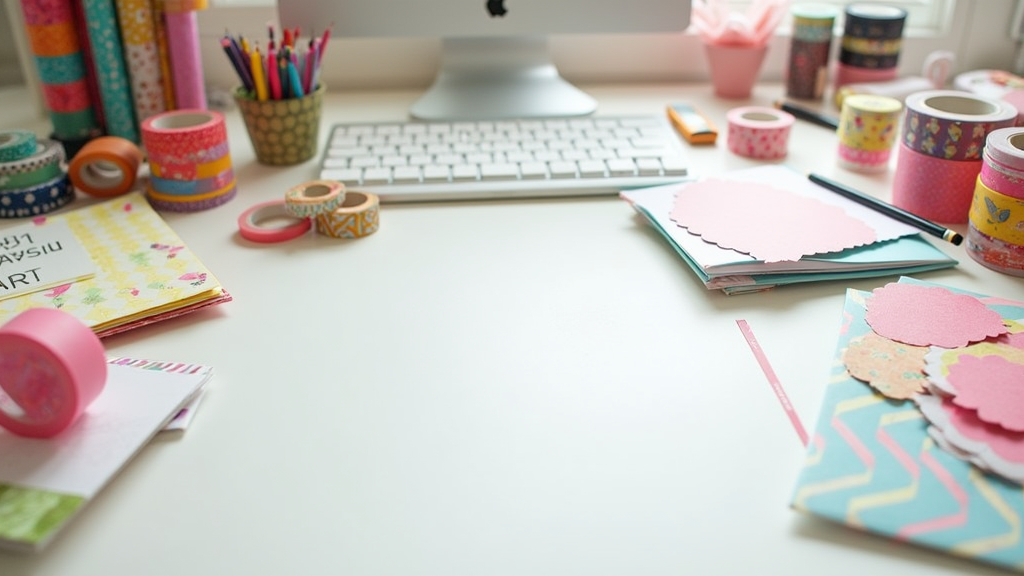
If you’re into stationery crafts, washi tape is probably already on your desk somewhere. I used to stick to the classic sticker like uses, but recently, I found out it can do a lot more than add a pop of color to a journal spread. Washi tape is honestly one of the most playful tools out there; pretty much a low-commitment way to get creative, since it peels up without a fuss. So if you’re looking for ways to give your stationery crafts a fun twist, checking out some under-the-radar washi tape hacks is a great way to start.
Getting Creative: Washi Tape Beyond Borders
Washi tape got popular for jazzing up notebook borders or outlining journal pages, but there are way more options if you’re up for some experimenting. I like to treat it as a mix between a sticker, a paintbrush, and a mini bookmark. The texture and patterns you get just make things pop much more than with regular tape or simple doodling.
Originally, washi tape was mainly a tool for crafters and scrapbookers in Japan, but over the last decade, it’s become a must-have all over the world. You can snag everything from classic floral and pastel styles to holographic, grid, or sushi print tape. This variety opens up so many options for nonstandard projects, especially for stationery fans who crave a bit of surprise in their routine.
Uncommon Washi Tape Ideas for Stationery Enthusiasts
Some of my favorites are the ideas that don’t even look like washi tape once you’re done. Here are some you might not have tried yet:
- Custom Tab Dividers: Fold a strip of washi tape over any notebook page to make an instant tab. If you want to organize sections, just layer a different pattern for each category; zero scissors, zero glue, and it comes off without leaving your pages torn or sticky.
- Washi Tape Envelopes: Create cute, pocket-sized envelopes out of any scrap paper. Lay out washi tape in rows (overlapping them slightly) on the back of a paper square, then fold and tape the sides to seal. It’s simple and your envelopes are totally unique.
- Pencil or Pen Makeovers: Give plain pens or pencils a refresh by spiraling washi tape around the shaft. You can even mix tapes and make stripes or a geometric pattern; super handy for keeping track of your favorite pen at school or in meetings.
- Page Edge Decorating: Instead of decorating just the header or margin, wrap washi tape around the side of several notebook pages for a cool block of color you see when the book is closed. Makes it easy to find a section but also gives off cheerful vibes when you open your notebook.
- Removable Labels: Got a pencil case, storage bin, or laptop but don’t want a permanent label? Write on a plain piece of washi tape (they take permanent marker and many ballpoints really well) and stick it wherever you need. When it’s time to mix it up, just peel off and swap in a new one.
Step-by-Step Washi Tape Craft Examples
Sometimes it’s helpful to see exactly how these ideas work, so I’ll walk you through two lesser known but seriously satisfying washi tape crafts I come back to often:
1. Washi Tape “Polaroid” Photo Frames
This one is a favorite if you’re into memory keeping or you love hanging photos. Grab your photo (printouts work best) and some washi tape that matches the photo colors.
- Lay your photo face up on your desk and line the edges with your washi tape, creating a border just like a classic “Polaroid” instant print.
- Layer a second tape for contrast, or overlap tapes for a layered pattern effect.
- If you want to stick these frames to your wall or a notebook, the tape will hold up fine and won’t damage the print or paper if you ever want to move it.
I’ve found this is especially fun for creating a photo grid on a bulletin board; no frames or pins needed, and you can swap out pictures whenever you want.
2. Book Spine Flags for Study Organization
Instead of regular sticky tabs, try this washi tape flag method for marking chapters or assignment due dates in your planner or textbooks.
- Take a strip of washi tape and stick half of it to the edge of a book page so the other half is free.
- Fold the free end over to stick to itself, creating a cute flag sticking out the side.
- If you’re feeling ambitious, you can layer smaller strips or punch through the tape with a hole punch for a fun shape.
This method is way sturdier than regular sticky notes, and you can color code for each topic or project. Plus, it just looks neat!
Tips for Choosing the Right Washi Tape
Shopping for washi tape can be a little overwhelming at first. There are a couple of things to keep in mind if you want to get the most out of it:
- Pattern vs Solid Colors: Having a mix lets you do layered designs or make headers stand out.
- Width: Thin tapes (3-5mm) are great for making straight lines or underlining words, while wider rolls are perfect for covering larger spaces or making envelopes and custom frames.
- Stickiness: Some super cheap tapes don’t stick well, especially on certain surfaces, so check reviews or buy a roll from a brand you know has decent adhesive.
- Opacity: Translucent tapes are fun for layering, but if you want to write on them or cover up writing underneath, go with opaque ones.
I keep a handful of neutral tapes on hand, plus a few wild patterns for projects where I want things to really pop. It’s amazing how a good mix can get you inspired for something new every week.
Things to Watch Out for in Washi Tape Crafts
Even though washi tape is pretty easy to use, some challenges come up once you start thinking outside the box. These are the ones I’ve hit and what I do about them:
- Curled Edges: Sometimes the tape will lift up on the edges, especially on textured paper or plastics. Press the tape down with the side of a pencil or a bone folder for a smooth finish.
- Bleeding Markers: If you want to write on your washi tape, stick to permanent markers or gel pens. Regular ballpoint and felt tip pens sometimes smear or skip on the tape finish.
- Sticky Residue: Most washi tape comes cleanly off paper but leaving it on for months or using super budget brands can leave a sticky shadow. Test on a spare scrap before using it for longterm projects.
- Matching Patterns: If you’re particular about stripes or plaids lining up, cut your washi tape with scissors instead of tearing, and line it up carefully for seamless borders or shapes.
Curled Edges
I noticed tapes with more saturated ink or a glossy finish are more likely to curl up if you use them for page edges or tabs, especially in humid weather. Pressing firmly helps, and placing a heavy book over your project for a couple of hours usually does the trick.
Bleeding Markers
I learned early on that fine liners are a no-go for writing on washi; just grab a Sharpie instead and you’ll be golden. Test your pen on a sample tape and give it a minute to dry.
Advanced Tricks for Washi Tape Lovers
Once you start playing with different styles, you’ll probably come up with more ideas of your own. Here are a couple of next level cool washi tape tricks I swear by:
Layered Washi Art: Cut geometric shapes from washi using a craft knife (on a cutting mat) and layer them to make textured, dimensional art right on your notebook cover or folder. This works especially well with translucent tapes or metallic finishes.
Custom Sticker Sheets: Stick washi tape onto parchment or wax paper, then cut out shapes or use a craft punch. Peel off your homemade stickers when needed. It’s far more flexible than buying specialty sticker packs and gives you a chance to make designs that really fit your personality.
DIY Gift Tags: Take a blank tag or cardstock shape, layer on some tape in fun lines or patterns, punch a hole, and tie onto any gift or treat. People love getting these little handmade touches—and it’s a fantastic last-minute trick when you want to make wrapped gifts just a bit more special.
Trying a few new approaches to washi tape crafts can give your stationery stash a fresh vibe and might even spark ideas for new projects. Don’t forget, washi is all about having fun and making things your own, so roll with whatever feels playful to you. Most importantly, don’t be afraid to experiment and let new ideas flow—there’s no wrong way to get creative with washi tape!
Popular Questions About Uncommon Washi Tape Crafts
Everyone has their own creative questions when getting into washi tape world. I’ve gathered a few of the ones I get most often:
Q: Does washi tape damage paper?
A: Washi tape is purposely low-tack, so it peels off most papers without ripping or leaving mess behind. Super thin or fibrous pages can be more fragile, so always test first if you’re worried.
Q: Can I use washi tape on non-paper surfaces?
A: Definitely! Washi tape works on plastic, glass, wood, even metal, though it may not stay stuck forever on slick or curved surfaces. I’ve decorated phone chargers, storage tins, and even laptop covers this way.
Q: How can I keep my washi tape crafts looking good over time?
A: Keep your projects away from direct sun and moisture, and if you need extra sticking power for high-use spots, a little dot of glue stick or double-sided tape under the washi works wonders.
Why Give Uncommon Washi Tape Crafts a Try?
Fresh washi tape ideas can totally give your creative energy a boost. Playing around with these tape tricks made me see my regular old stationery in a brand new light. Plus, it’s a super affordable and low-risk way to personalize your stuff or surprise a friend with something handmade. So, grab a roll or two next time you’re at the store; there are way more uses for washi tape than just pretty page borders. The possibilities are truly endless, and you never know what you’ll stumble upon next!